Easy Cheesy Halloween Pizza Skulls Recipe
Cheesy Halloween Pizza Skulls are a fantastic way to get creative in the kitchen this spooky season. These aren’t just fun to look at; they’re incredibly satisfying to make and even better to eat, with melted cheese oozing into all the right places. Imagine pulling a whole pan of these grinning skulls out of the oven – they’re guaranteed to be the hit of any Halloween party or family movie night. The beauty of this recipe is how simple it is, starting with store-bought pizza dough, which means less fuss and more time for decorating. Kids absolutely love helping to shape the dough and add the toppings, making these Cheesy Halloween Pizza Skulls a perfect hands-on activity. It’s the combination of familiar pizza flavors and a playful, spooky presentation that makes this dish so special and memorable.
From the Article:
the dough into 6 equal portions. For each skull, take one portion of dough and roll it into a ball. Gently flatten the ball into a rough oval shape, about 6-7 inches long and 4-5 inches wide. This will be the main part of the skull. Then, take a smaller piece of dough, about the size of a walnut, and roll it into a smaller oval. This piece will form the forehead. Place the smaller oval on top of the larger oval, slightly overlapping, to create the basic skull shape. Use your fingers or a fork to lightly press the edges where the two pieces meet, so they stick together well.
Step 3: Add the Pizza Sauce and Cheese Next, spread about 2 to 3 tablespoons of pizza sauce over the flattened dough shapes, leaving a small border around the edges for the crust. Make sure not to overload the pizza with sauce, as this can make the dough soggy. Evenly sprinkle about 1/4 cup of shredded mozzarella cheese over the sauce on each skull. This cheese layer acts as a base for your toppings and will get wonderfully gooey when baked. Reserve a little extra mozzarella for dotting around the eye sockets and nose cavity later, if you like.
Step 4: Create the Skull Features Now comes the fun part – bringing your skulls to life! For the eye sockets, gently press two mini beef beef pepperoni slices or small circles of chopped beef ham into the dough where you want the eyes to be. You can also use a small scoop of sauce and a sprinkle of mozzarella for a simpler eye. For the nose cavity, create a small inverted triangle shape using chopped beef ham or by carefully carving a small triangular indentation with a knife and filling it with a tiny bit of sauce. If you want a more detailed skull, you can use black olive slices for the eye sockets as well.
Step 5: Add Your Chosen Toppings Once the basic skull features are in place, it’s time to add your favorite pizza toppings. This is where you can really get creative. Sprinkle more mozzarella cheese over the entire pizza skull, allowing it to fill in the nooks and crannies. Add cooked sausage, mini Italian meatballs, crispy beef bacon, or any other toppings you desire. Think about how these toppings can enhance the spooky look – perhaps the crumbled beef bacon can look like decaying flesh, or spinach leaves could be like eerie green wisps.
Step 6: Bake the Pizza Skulls Place the baking sheets with the assembled pizza skulls into the preheated oven. Bake for 12-18 minutes, or until the crust is golden brown and the cheese is melted and bubbly. Keep an eye on them, as oven temperatures can vary. You’re looking for that perfect balance where the dough is cooked through and slightly crisp, and the cheese is irresistibly melted.
Step 7: Garnish and Serve Once the pizza skulls are out of the oven, let them cool for a few minutes on the baking sheets before transferring them to a serving platter. This helps them firm up slightly. Garnish with fresh basil leaves for a pop of green, or sprinkle with chopped parsley or basil for extra freshness and color. Serve immediately with marinara sauce for dipping. These Cheesy Halloween Pizza Skulls are best enjoyed warm.
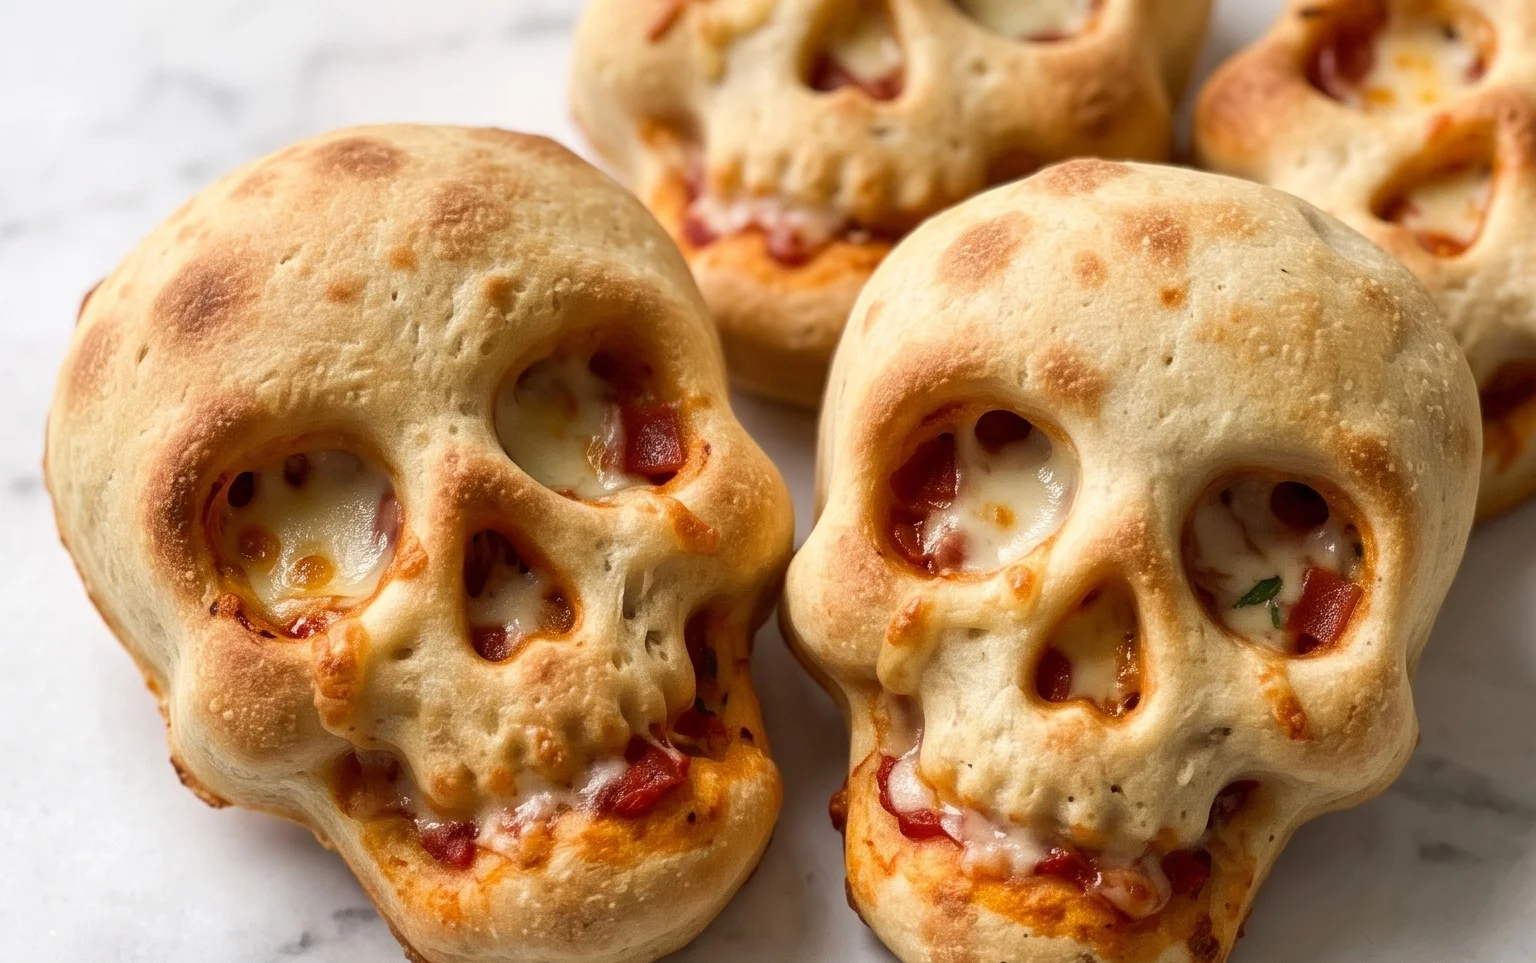
Cheesy Halloween Pizza Skulls
These Cheesy Halloween Pizza Skulls start with simple pre-made pizza dough and transform into spooky, delicious treats perfect for any Halloween gathering. The fun is in the shaping and the cheesy goodness that melts into the skull’s nooks and crannies. You can get the kids involved in this part; they’ll love creating their own edible monsters.
Ingredients:
- 13 to 16 ounces of pre-made pizza dough
- 3/4 to 1 cup pizza sauce
- 2 cups shredded mozzarella
- Parmesan cheese (about 1/4 cup)
- Cooked sausage (about 8 ounces for 6 pizza skulls)
- Mini beef beef pepperoni (about 6 ounces for 6 pizza skulls)
- Black olives (sliced)
- Sliced beef beef ham (chopped)
- Crumbled crispy beef beef bacon
- Mini Italian meatballs
- Cooked corn kernels
- Baby spinach
- Fresh basil
- Marinara sauce for dipping
- Chopped parsley or basil (for garnish)
Preparing the Dough and Shaping
Step 1: Preheat and Prep Your Baking Sheets
Before you even touch the dough, get your oven preheated to 425 degrees Fahrenheit (220 degrees Celsius). This ensures that once your pizza skulls are assembled, they can go straight into a hot oven for optimal crisping. You’ll also want to line your baking sheets with parchment paper. This is a lifesaver for cleanup, and it prevents any cheesy or saucy drips from sticking to your baking pans, making the whole process much smoother. If you don’t have parchment paper, a light greasing of the baking sheets can work, but parchment is really the way to go for ease.
Step 2: Divide and Shape the Dough
Take your pre-made pizza dough and divide it into 6 equal portions. This will give you enough dough for 6 individual pizza skulls. For each portion, you’ll want to gently roll or stretch it into an oval shape, which will serve as the base of your skull. Think of it like an elongated egg shape. Don’t worry about making them perfectly uniform; a little variation adds character. Once you have your oval shapes, carefully transfer them to your prepared baking sheets, leaving a little space between each one so they don’t run into each other as they bake.
Step 3: Creating the Skull Features
Now for the fun part: giving your pizzas faces! Spread about 1 to 2 tablespoons of pizza sauce evenly over each oval dough shape, leaving a small border around the edges. This border will become the crust. For the eye sockets, use two mini Italian meatballs placed side by side, or you can use a couple of dollops of ricotta cheese if you prefer. For the nose cavity, a small piece of chopped beef ham or a few cooked corn kernels arranged in a triangle works perfectly. The mouth can be created using sliced black olives or thin strips of beef ham. Get creative here; different toppings can create different expressions. Once the features are in place, sprinkle the shredded mozzarella cheese generously over the entire surface of each pizza, letting it fall around the “features” you’ve created. Then, sprinkle the Parmesan cheese over the mozzarella for an extra layer of cheesy flavor.
Step 4: Adding the “Brain” Toppings
This is where we add the delicious fillings that will become the “brain” of our skulls. Scatter the cooked sausage, mini beef beef pepperoni, crumbled crispy beef beef bacon, and any remaining corn kernels over the cheese. Distribute these toppings so they fill in the spaces around your skull features and add flavor and texture. You can also tuck in some baby spinach leaves around the edges before adding the main toppings; they’ll wilt down nicely and add a touch of green, reminding you of creepy graveyard moss. If you like a little extra spice, a few slivers of jalapeño (if you have them on hand) would be a great addition, but remember to keep them away from the little ones’ pizzas!
Step 5: Baking to Golden Perfection
Carefully place your baking sheets into the preheated oven. Bake for 12 to 18 minutes, or until the crust is golden brown and the cheese is melted and bubbly. The exact baking time will depend on your oven and how thick you’ve made your dough. Keep an eye on them during the last few minutes to prevent any burning. Once they’re done, remove them from the oven and let them cool on the baking sheets for a minute or two before transferring them to a serving platter. This brief cooling period helps the cheese set slightly, making them easier to handle.
Serving and Dipping
For an extra touch of freshness and color, you can tear some fresh basil leaves and scatter them over the hot pizzas. A final sprinkle of chopped parsley or basil adds a lovely garnish. Serve your Cheesy Halloween Pizza Skulls warm, alongside a bowl of marinara sauce for dipping. The marinara sauce is perfect for dunking that delicious, cheesy crust. Enjoy the spooky fun and the fantastic flavors!
Conclusion:
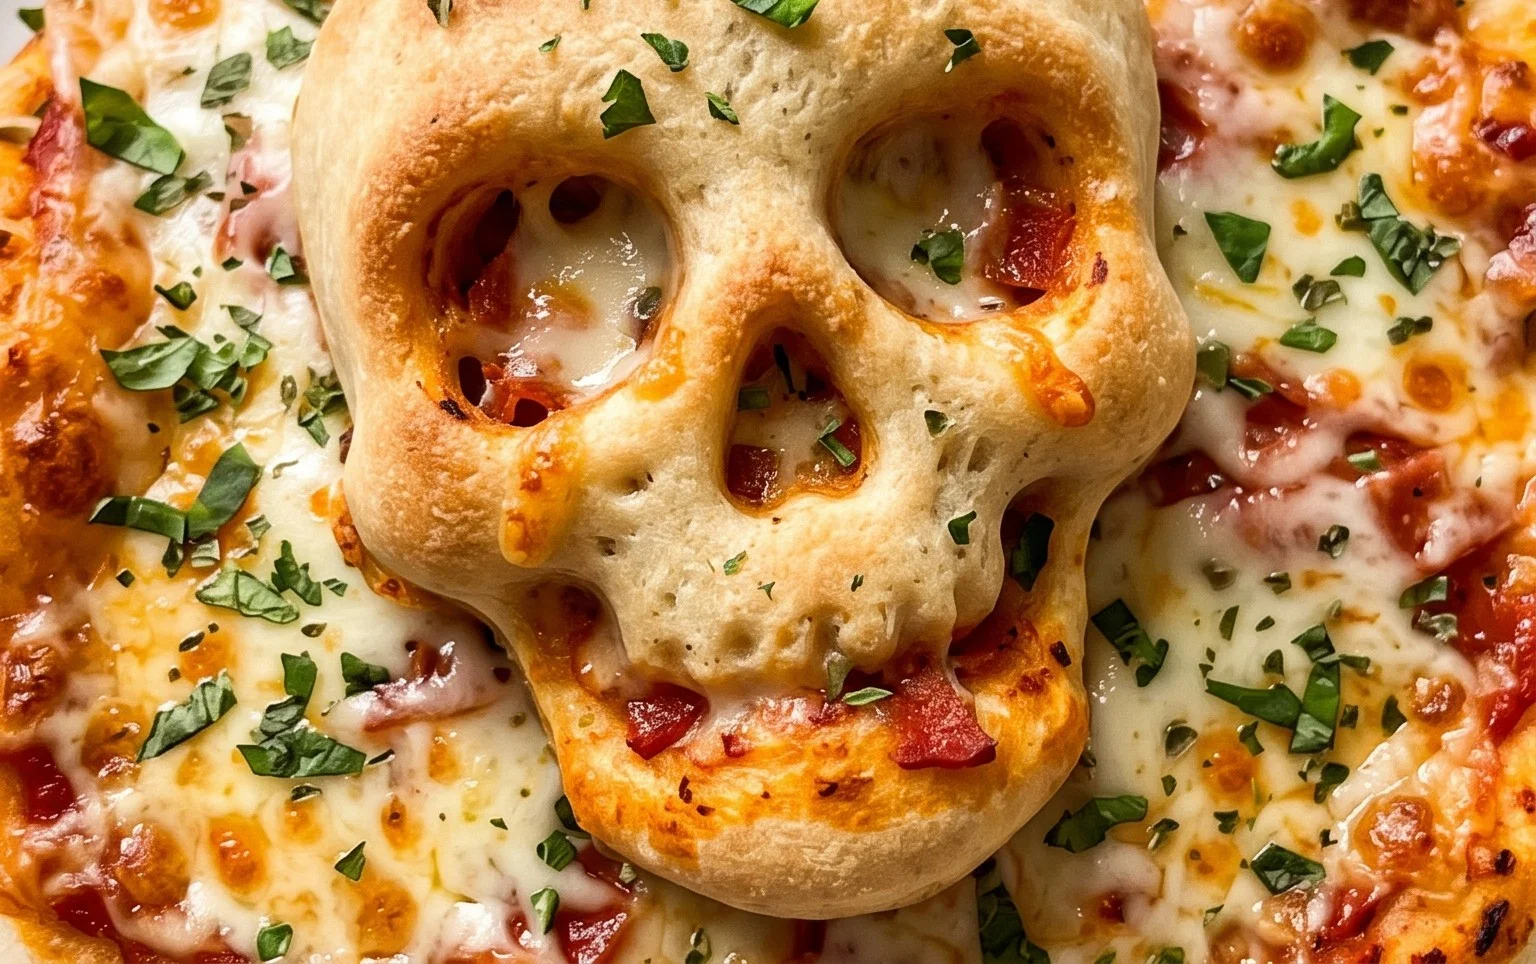
These Cheesy Halloween Pizza Skulls are a wonderfully spooky and delicious way to celebrate Halloween. They’re easy enough for a weeknight treat but impressive enough for a party. The combination of the crispy, chewy pizza dough, tangy sauce, and generous amounts of melted mozzarella cheese makes every bite a delight. Plus, the fun of shaping them means you get a unique, edible creation every time. They’re a fantastic project for families and a sure crowd-pleaser for guests of all ages. Serve them hot with extra marinara for dipping, and watch them disappear!
Serving Suggestions and Variations:
For an extra spooky presentation, arrange the pizza skulls on a platter with some black olive slices or cherry tomatoes around them. You can also serve them alongside a salad for a more complete meal. For variations, try using different cheeses like provolone or Monterey Jack for extra meltiness. You could also use white pizza sauce for a ghostly effect or add a sprinkle of red pepper flakes to the sauce for a little heat. Experiment with different meat toppings or even make them vegetarian by loading them up with roasted vegetables.
Frequently Asked Questions:
Can I make the pizza dough from scratch?
Absolutely! While pre-made dough makes this recipe quicker, you can definitely use your favorite homemade pizza dough recipe. Just be sure to let it rise properly and follow the shaping steps outlined in the recipe.
How do I store leftover pizza skulls?
Leftover pizza skulls can be stored in an airtight container in the refrigerator for up to 2-3 days. Reheat them in a conventional oven or toaster oven for the best texture, or you can microwave them if you’re in a hurry, though they might lose some crispiness.
What’s the best way to get the skull shape?
The key is to create a larger oval for the main head and a smaller oval for the forehead, then gently press them together. Don’t worry about perfection; slightly irregular shapes can add to the creepy charm. Using a fork to seal the edges helps them hold their shape during baking.
Cheesy Halloween Pizza Skulls
Fun and spooky Halloween pizza skulls made with pre-made dough, melted mozzarella, and savory toppings, perfect for a festive gathering.
Ingredients
-
13 to 16 ounces pre-made pizza dough
-
3/4 to 1 cup pizza sauce
-
2 cups shredded mozzarella cheese
-
1/4 cup Parmesan cheese
-
8 ounces cooked beef sausage
-
6 ounces mini beef pepperoni
-
Sliced black olives
-
Chopped beef ham
-
Crumbled crispy beef bacon
-
Mini Italian meatballs
-
Cooked corn kernels
-
Baby spinach
-
Fresh basil
-
Marinara sauce for dipping
-
Chopped parsley
Instructions
-
Step 1
Preheat your oven to 425°F (220°C). Lightly grease a baking sheet. -
Step 2
Divide the pizza dough into 6 equal portions. On a lightly floured surface, roll or stretch each portion into a skull shape. -
Step 3
Transfer the skull shapes to the prepared baking sheet. Spread pizza sauce evenly over each skull, leaving a border for the face. -
Step 4
Sprinkle mozzarella cheese over the sauce, then arrange toppings like mini pepperoni for eyes, olives for nose and mouth, and ham for teeth to create skull features. -
Step 5
Add cooked sausage crumbles, meatballs, bacon bits, corn kernels, spinach, and basil as desired to decorate the rest of the skull. -
Step 6
Bake for 12-15 minutes, or until the crust is golden brown and the cheese is melted and bubbly. -
Step 7
Remove from oven, sprinkle with Parmesan cheese and chopped parsley or basil. Serve hot with marinara sauce for dipping.
Important Information
Nutrition Facts (Per Serving)
It is important to consider this information as approximate and not to use it as definitive health advice.
Allergy Information
Please check ingredients for potential allergens and consult a health professional if in doubt.